Authentication#
This section describes how to set up various authentication providers for the 2i2c JupyterHubs.
Auth0#
auth0 provides authentication for the majority of 2i2c hubs. It can be configured with many different connections that users can authenticate with - such as Google, GitHub, etc.
Note
If you wish to authenticate users based on their membership in a GitHub organization or team, you’ll need to use the native GitHub OAuthenticator instead.
So we want to manage authentication by:
Explicitly listing the type of connection we want for this hub, via
auth0.connection. Currently common ones aregoogle-oauth2for Google &githubfor GitHub. Users of the hub will use this method to log in to the hub.You can set the auth0 connector for a hub with:
auth0:
   connection: google-oauth2
Theoretically, every provider in this list is supported. However, we’ve currently only tested this with Google (
google-oauth2) and GitHub (github)Explicitly list admin users for a given hub. These admin users will be the only ones allowed to log in to begin with. They can use the JupyterHub admin interface (available from their hub control panel) to explicitly allow more users into the hub. This way, we don’t need to be involved in explicitly allowing users into hubs.
In the admin interface, admin users can add users via a username appropriate for the auth connector used. For GitHub, it’s the username. For Google Auth, it’s the email address.
You can set the admin interfaces for a hub like this:
jupyterhub:
  auth:
    allowed_users:
        # WARNING: THESE USER LISTS MUST MATCH (for now)
        - user1@gmail.com
        - user2@gmail.com
    admin_users:
        # WARNING: THESE USER LISTS MUST MATCH (for now)
        - user1@gmail.com
        - user2@gmail.com
Switching auth
Switching authentication providers (e.g. from GitHub to Google) for a pre-existing hub will simply create new usernames. Any pre-existing users will no longer be able to access their accounts (although administrators will be able to do so). If you have pre-existing users and want to switch the hub authentication, rename the users to the new auth pattern (e.g. convert github handles to emails).
GitHub Orgs and Teams#
Note
This setup is currently only supported for communities that require authentication via a GitHub organisation or team.
We may update this policy in the future.
For communities that require authenticating users against a GitHub organisation or team, we instead use the native JupyterHub OAuthenticator.
This involves a few more manual steps than the auth0 setup described above.
There are also some steps that a Community Representative will need to take to set up authentication, described below.
Create a GitHub OAuth App. This can be achieved by following GitHub’s documentation.
Create a new app inside the
2i2c-org.When naming the application, please follow the convention
<cluster_name>-<hub_name>for consistency, e.g.2i2c-stagingis the OAuth app for the staging hub running on the 2i2c cluster.The Homepage URL should match that in the
domainfield of the appropriatecluster.yamlfile in theinfrastructurerepo.The authorisation callback URL is the homepage url appended with
/hub/oauth_callback. For example,staging.pilot.2i2c.cloud/hub/oauth_callback.Once you have created the OAuth app, make a new of the client ID, generate a client secret and then hold on to these values for a future step
Create or update the appropriate secret config file under
config/clusters/<cluster_name>/<hub_name>.secret.values.yaml. You should add the following config to this file, pasting in the client ID and secret you generated in step 1.jupyterhub: hub: config: GitHubOAuthenticator: client_id: CLIENT_ID client_secret: CLIENT_SECRET
Note
Add the
basehubkey above thejupyterhubkey fordaskhubdeployments. For example:basehub: jupyterhub: ...
Note
Make sure this is encrypted with
sopsbefore committing it to the repository!sops --output config/clusters/<cluster_name>/enc-<hub_name>.secret.values.yaml --encrypt config/clusters/<cluster_name>/<hub_name>.secret.values.yamlSet the hub to not configure Auth0 in the
config/clusters/<cluster_name>/cluster.yamlfile. To ensure the deployer does not provision and configure an OAuth app from Auth0, the following config should be added to the appropriate hub in the cluster’scluster.yamlfile.hubs: - name: <hub_name> auth0: enabled: false
If not already present, add the secret hub config file to the list of helm chart values file in
config/clusters<cluster_name>/cluster.yaml. If you created theenc-<hub_name>.secret.values.yamlfile in step 2, add it the thecluster.yamlfile like so:... hubs: - name: <hub_name> ... helm_chart_values_files: - <hub_name>.values.yaml - enc-<hub_name>.secret.values.yaml ...
Edit the non-secret config under
config/clusters/<cluster_name>/<hub_name>.values.yaml. You should make sure the matching hub config takes one of the following forms.Warning
When using this method of authentication, make sure to remove the
allowed_userskey from the config. This is because this key will block any user not listed under it even if they are valid members of the the organisation or team you are authenticating against.You should keep the
admin_userskey, however.To authenticate against a GitHub organisation (Note the
read:userscope. See comment box below.):jupyterhub: hub: config: JupyterHub: authenticator_class: github GitHubOAuthenticator: oauth_callback_url: https://{{ HUB_DOMAIN }}/hub/oauth_callback allowed_organizations: - 2i2c-org - ORG_NAME scope: - read:user
To authenticate against a GitHub Team (Note the
read:orgscope. See the comment box below.):jupyterhub: hub: config: JupyterHub: authenticator_class: github GitHubOAuthenticator: oauth_callback_url: https://{{ HUB_DOMAIN }}/hub/oauth_callback allowed_organizations: - 2i2c-org:tech-team - ORG_NAME:TEAM_NAME scope: - read:org
A note on scopes
When authenticating against a whole organisation, we used the
read:userscope in the example above. This means that the GitHub OAuth App will read the user’s profile to determine whether the currently authenticating user is a member of the listed organisation. It also requires the user to have their membership of the organisation publicly listed otherwise authentication will fail, even if they are valid members.To avoid this requirement, you may choose to use the
read:orgscope instead. This grants the GitHub OAuth App permission to read the profile of the whole organisation, however, and may be more powerful than the organisation owners wish to grant. So use your best judgment here.When authenticating against a GitHub Team, we are required to use the
read:orgscope as the GitHub OAuth App needs to know which teams belong to the organisation as well as the members of the specified team.Run the deployer as normal to apply the config.
Follow-up: GitHub organization administrators must grant access#
Once the OAuth callbacks have been set up following the steps above, somebody with administrator permissions for the GitHub organization needs to grant access to the OAuth app that we have created.
The first time that somebody tries to log on to the hub with this authentication set up, they should be presented with a page that asks them to grant access to various GitHub organizations.
For each user, GitHub will list all organizations to which they can control authorization.
They must grant access to the organization that is added to allowed_organizations above, but do not need to grant access to any other organizations.
In this case, “granting access” only means that the JupyterHub can view whether a user is a member of the GitHub organization.
If administrators report a 403 forbidden error when they try to log in to the hub, there is a good chance that they did not grant access to the right GitHub organization.
In this case, they should go to the configuration page for this app within their GitHub organization and explicitly grant it access.
See the GitHub apps for organizations docs for more information.
Restricting user profiles based on GitHub Team Membership#
JupyterHub has support for using profileList to give users a choice of machine sizes and images to choose from when launching their server.
In addition, we can allow people access to specific profiles based on their GitHub Teams membership! This only works if the hub is already set to allow people only from certain GitHub organizations to log in.
The key allowed_teams can be set for any profile definition, with a list of GitHub
teams (formatted as <github-org>:<team-name>) that will get access to that profile. Users
need to be a member of any one of the listed teams for access. The list of teams a user
is part of is fetched at login time - so if the user is added to a GitHub team, they need
to log out and log back in to the JupyterHub (not necessarily to GitHub!) to see the new
profiles they have access to. To remove access to a profile from a user, they have to be
removed from the appropriate team on GitHub and their JupyterHub user needs to be
deleted from the hub admin dashboard.
To enable this access,
Enable storing the list of GitHub teams a user is in as a part of
auth_statewith the following config:jupyterhub: hub: config: Authenticator: enable_auth_state: true GitHubOAuthenticator: populate_teams_in_auth_state: true
If
populate_teams_in_auth_stateis not set, this entire feature is disabled.Specify which teams should have access to which profiles with an
allowed_teamskey underprofileList:jupyterhub: singleuser: profileList: - display_name: "Small" description: 5GB RAM, 2 CPUs default: true allowed_teams: - <org-name>:<team-name> - 2i2c-org:tech-team kubespawner_override: mem_limit: 7G mem_guarantee: 4.5G node_selector: node.kubernetes.io/instance-type: n1-standard-2 - display_name: Medium description: 11GB RAM, 4 CPUs allowed_teams: - <org-name>:<team-name> - 2i2c-org:tech-team kubespawner_override: mem_limit: 15G mem_guarantee: 11G node_selector: node.kubernetes.io/instance-type: n1-standard-4
Users who are a part of any of the listed teams will be able to access that profile. Add
2i2c-org:teach-teamto allallowed_teamsso 2i2c engineers can log in to debug issues. Ifallowed_teamsis not set, that profile is not available to anyone.
CILogon#
CILogon is a service provider that allows users to login against various identity providers, including campus identity providers. 2i2c can manage CILogon either using the JupyterHub CILogonOAuthenticator or through auth0, similar to Google and GitHub authentication.
Some key terms about CILogon authentication worth mentioning:
- Identity Provider
The authentication service available through the CILogon connection.
When a user logs in via CILogon, they are first presented with a list of various institutions and organizations that they may choose from (e.g.
UC BerkeleyorAustralia National University).The available identity providers are members of InCommon, a federation of universities and other organizations that provide single sign-on access to various resources.
Example:

A list of Identity Providers the user may select from.#
- User account
Within an institution, each user is expected to have their own user account (e.g.
myname@berkeley.edu). This is the account that is used to give somebody an ID on their JupyterHub. This is entered on an Identity Provider’s login screen. For example: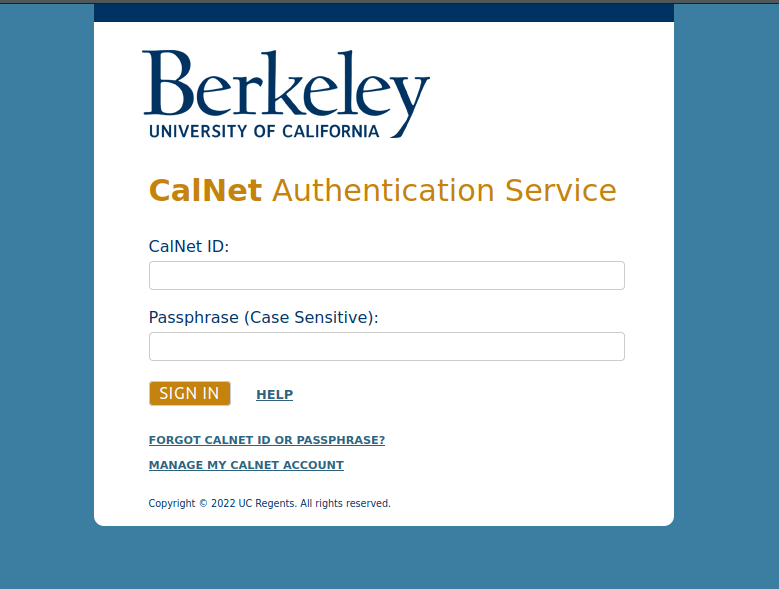
The Berkeley authentication screen.#
Note
The JupyterHub usernames will be the email address that users provide when authenticating with an institutional identity provider. It will not be the CILogon
user_id! This is because theUSERNAME_KEYused for the CILogon login is the email address.
JupyterHub CILogonOAuthenticator#
The steps to enable the JupyterHub CILogonOAuthenticator for a hub are simmilar with the ones for enabling GitHubOAuthenticator:
Create a CILogon OAuth client This can be achieved by using the cilogon_app.py script.
The script needs to be passed the cluster and hub name for which a client id and secret will be generated, but also the hub type, and the authorisation callback URL.
The authorisation callback URL is the homepage url appended with
/hub/oauth_callback. For example,staging.pilot.2i2c.cloud/hub/oauth_callback.Example script invocation that creates a CILogon OAuth client for the 2i2c dask-staging hub:
python3 ./deployer/cilogon_app.py create 2i2c dask-staging daskhub https://dask-staging.2i2c.cloud/hub/oauth_callback
If successfull, the script will have created a secret values file under
config/clusters/<cluster_name>/enc-<hub_name>.secret.values.yaml. This file holds the encrypted OAuth client id and secret that have been created for this hub.The unecrypted file contents should look like this:
  jupyterhub:
    hub:
      config:
        CILogonOAuthenticator:
          client_id: CLIENT_ID
          client_secret: CLIENT_SECRET
Set the hub to not configure Auth0 in the
config/clusters/<cluster_name>/cluster.yamlfile. To ensure the deployer does not provision and configure an OAuth app from Auth0, the following config should be added to the appropriate hub in the cluster’scluster.yamlfile.hubs: - name: <hub_name> auth0: enabled: false
If not already present, add the secret hub config file to the list of helm chart values file in
config/clusters<cluster_name>/cluster.yaml. If you created theenc-<hub_name>.secret.values.yamlfile in step 2, add it the thecluster.yamlfile like so:... hubs: - name: <hub_name> ... helm_chart_values_files: - <hub_name>.values.yaml - enc-<hub_name>.secret.values.yaml ...
Edit the non-secret config under
config/clusters/<cluster_name>/<hub_name>.values.yaml. You should make sure the matching hub config takes one of the following forms.Warning
When using this method of authentication, make sure to remove the
allowed_userskey from the config. This is because this key will block any user not listed under it even if they are valid members of the the organisation or team you are authenticating against.Also, the
admin_userslist need to matchallowed_idpscurrently. Reference jupyterhub/oauthenticator#494.To authenticate using CILogon, allowing only a certain identity provider:
jupyterhub:
  hub:
    config:
      JupyterHub:
        authenticator_class: cilogon
      CILogonOAuthenticator:
        oauth_callback_url: https://{{ HUB_DOMAIN }}/hub/oauth_callback
        username_claim: USERNAME_KEY
        allowed_idps:
          - 2i2c.org
          - IDP
Check the CILogon scopes
section to checkout available
values for USERNAME_KEY claim. This cannot be changed afterwards without manual
migration of user names, so choose this carefully.
Warning
USERNAME_KEY should be something the user cannot change in any of the identity providers
we support. If they can, it can be easily used to impersonate others! For example, if we allow
both GitHub and utoronto.ca as allowed authentication providers, and only use email as
USERNAME_KEY, any GitHub user can set their email field in their GitHub profile to a utoronto.ca
email and thus gain access to any utoronto.ca user’s server! So a very careful choice needs to
be made here.
Run the deployer as normal to apply the config.
CILogon through Auth0#
See also
See the CILogon documentation on Auth0 for more configuration information.
The steps to enable the CILogon authentication through Auth0 for a hub are:
List CILogon as the type of connection we want for a hub, via
auth0.connection:auth0: connection: CILogon
Add admin users to the hub by explicitly listing their email addresses. Add allowed users for the hub by providing a regex pattern that will match to an institutional email address. (see example below)
Note
Don’t forget to allow login to the test user (deployment-service-check), otherwise the hub health check performed during deployment will fail.
Example config for CILogon through Auth0#
The CILogon connection works by providing users the option to login into a hub using any CILogon Identity Provider of their choice, as long as the email address of the user or the entire organization (e.g. *@berkeley.edu) has been provided access into the hub.
The following configuration example shows off how to configure hub admins and allowed users:
Hub admins are these explicit emails:
one
@campus.eduuserone
@gmail.comuserthe 2i2c staff (identified through their 2i2c email address)
Allowed users are matched against a pattern, with a few specific addresses added in as well
all
@2i2c.orgemail adressesall
@campus.eduemail addressesuser2@gmail.comthe test username,
deployment-service-check
jupyterhub:
  custom:
    2i2c:
      add_staff_user_ids_to_admin_users: true
      add_staff_user_ids_of_type: "google"
  hub:
    config:
      Authenticator:
        admin_users:
          - user1@campus.edu
          - user2@gmail.com
        username_pattern: '^(.+@2i2c\.org|.+@campus\.edu|user2@gmail\.com|deployment-service-check)$'
Note
All the users listed under admin_users need to match the username_pattern expression otherwise they won’t be allowed to login!
Switch Identity Providers or user accounts#
By default, logging in with a particular user account will persist your credentials in future sessions. This means that you’ll automatically re-use the same institutional and user account when you access the hub’s home page.
Switch Identity Providers#
Logout of the Hub using the logout button or by going to
https://{hub-name}/hub/logout.Clear browser cookies (optional). If the user asked CILogon to re-use the same Identity Provider connection when they logged in, they’ll need to clear browser cookies for https://cilogon.org.

The dialog box that allows you to re-use the same Identity Provider.#
Firefox example:

An example of clearing cookies with Firefox.#
The next time the user goes to the hub’s landing page, they’ll be asked to re-authenticate and will be presented with the list of available Identity Providers after choosing the CILogon connection.
They can now choose another Identity Provider via CILogon.
Note
If the user choses the same Identity Provider, then they will be automatically logged in with the same user account they’ve used before. To change the user account, see Switch user account.
Switch user account#
Logout of the Hub using the logout button or by going to
https://{hub-name}/hub/logout.Logout of CILogon by going to the CILogon logout page.
The next time the user goes to the hub’s landing page, they’ll be asked to re-authenticate and will be presented with the list of available Identity Providers after choosing the CILogon connection.
Choose the same Identity Provider to login.
The user can now choose another user account to login with.
403 - Unauthorized errors#
If you see a 403 error page, this means that the account you were using to login hasn’t been allowed by the hub administrator.

If you think this is an error, and the account should have been allowed, then contact the hub adminstrator/s.
If you used the wrong user account, you can log in using another account by following the steps in Switch user account.